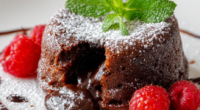
Chocolate fondant always felt like a secret sweet handshake—something special you keep close, yet share with others when the moment calls for it. There’s that thrill of breaking into its shiny top and watching the molten center spill out, warm and glossy, like a little burst of happiness. It’s simple, honest baking, but with a touch of magic that feels like an inside joke between the oven and me.
I love how each batch is a bit different—sometimes the center is more gooey, other times just softly molten. It’s a reminder that life isn’t about perfection but about embracing what’s imperfect and fleeting. Making this feels like a quiet celebration of those tiny, reckless moments that remind us to slow down and savor the richness, even if just for a few seconds.
Focusing on how the molten center of a chocolate fondant mirrors the fleeting moments of life—perfectly imperfect, rich, and transient—like a small burst of joy that reminds us to savor each bite and each moment.
The fleeting magic of molten chocolate
- That first warm, gooey bite still surprises me—like a secret I shouldn’t share.
- Nothing beats the chaos of pulling these out just a tad undercooked—hopeful for that perfect center.
- Baking this takes me back to my grandma’s kitchen—simple ingredients, big memories.
- I feel a rush every time I see the molten chocolate spill out—like a tiny victory.
- Sometimes, I mess up and get the center too firm—learning to trust the timing is part of the fun.
The magic behind this dessert
- This recipe was born out of a late-night craving and a poorly stocked fridge. I wanted something quick, rich, and satisfying—something that felt indulgent but wasn’t a full-blown cake. The idea of that molten center just kept coming back, like a secret whisper in my mind each time I opened the pantry.
- I remember experimenting in my tiny kitchen, trying to get that perfect gooey core without overcooking the edges. It’s a balancing act—kind of like life, really. Over the years, I’ve learned that a little chaos in the oven can lead to the most memorable bites, especially when served with a dusting of powdered sugar and a splash of espresso.
- heading
- story_type
Chocolate Fondant Trivia
- Chocolate fondant, also known as lava cake, was reportedly invented in the 1980s, with multiple claims from France and the US claiming its creation.
- The name ‘fondant’ refers to the melting, ‘fondant-like’ interior, a technique that originated in French pastry art to create contrasting textures.
- Originally, these desserts were a way to showcase molten chocolate, a luxury ingredient, in a simple yet decadent form that could impress at dinner parties.
Ingredient breakdown: key components
- Butter: I use unsalted butter for that rich, creamy base—makes the chocolate shine brighter, and you can tweak the saltiness if needed.
- Dark chocolate: I prefer 70% cocoa for depth—look for a glossy, fragrant bar; it’s the soul of that molten center, so don’t skimp on quality.
- Eggs: Fresh, room temp eggs help everything blend smoothly—aim for a slight jiggle when baked, not a firm set, to keep that gooey core.
- Sugar: I stick to superfine for quick dissolving—if you want less sweetness, cut back, but that contrast of bitter and sweet is key here.
- Flour: Just a touch—like a whisper—to give structure without dulling the molten magic—sift well to avoid lumps, especially if using whole wheat.
- Butter & flour for ramekins: Grease generously and dust with cocoa powder—prevents sticking and adds a tiny chocolate boost when you unmold.
- Optional vanilla: A splash of extract lifts the richness—don’t overdo it, just a hint to deepen the chocolate aroma, especially when serving warm.
Spotlight on key ingredients
Dark chocolate:
- I prefer 70% for that intense, slightly bitter richness, which balances the sweetness and melts smoothly, creating that luscious, oozy center.
- Butter: I use unsalted, high-quality butter to give the fondant a silky texture and deep flavor; it also helps the batter set just right without becoming greasy.
Eggs and Sugar:
- Eggs: Fresh, room temperature eggs are crucial—they give structure and help achieve that perfect jiggle, with a tender crumb that melts on the tongue.
- Sugar: Superfine sugar dissolves quickly, ensuring a smooth batter and a glossy, crackly top—just the right contrast for that molten effect.
Notes for ingredient swaps
- Dairy-Free: Swap butter for coconut oil or a neutral vegetable oil. It might alter the richness slightly but keeps the texture tender.
- Vegan Chocolate: Use dairy-free dark chocolate and a plant-based butter alternative. Expect a less creamy, more intense cocoa flavor.
- Gluten-Free: Replace all-purpose flour with almond flour or gluten-free baking blend. The texture may be slightly denser but still luscious.
- Less Sweet: Reduce sugar by a quarter or replace part with coconut sugar for a caramel note. The fondant will be less sweet but still satisfy chocolaty cravings.
- Extra Rich: Add a tablespoon of espresso powder or a splash of bourbon to enhance depth and complexity in flavor.
- Nutty Twist: Mix in crushed hazelnuts or almonds into the batter for added texture and aroma. Skip if nut allergies are a concern.
- Fruit Infusion: Fold in a few raspberries or orange zest into the batter for a bright, aromatic contrast to the deep chocolate.
Equipment & Tools
- Ramekins: To bake individual portions with easy unmolding.
- Double boiler or microwave: For gently melting chocolate and butter without burning.
- Whisk: To mix eggs, sugar, and combine batter smoothly.
- Sieve: To sift flour and avoid lumps in the batter.
- Baking tray: To hold ramekins steady in the oven.
- Spatula or small knife: To loosen edges and invert the fondants smoothly.
Step-by-step guide to chocolate fondant
- Preheat your oven to 200°C (390°F). Grease four ramekins generously with butter, then dust with cocoa powder. Tap out excess. This ensures easy unmolding and adds a chocolatey crunch.
- Melt 200g dark chocolate and 100g butter together. You can do this gently over a double boiler or in short bursts in the microwave, stirring often. You want a shiny, smooth mixture, no lumps. This is the soul of your fondant.
- In a separate bowl, whisk 3 eggs with 100g superfine sugar until slightly frothy and well combined. This step should take about 2 minutes. The mixture should look pale and slightly thickened.
- Pour the melted chocolate mixture into the eggs and sugar, folding gently to combine. Add a teaspoon of vanilla extract if using. Be careful not to deflate the mixture; fold just until integrated.
- Sift 30g all-purpose flour into the batter, then fold gently. You want a thick, glossy batter that holds its shape but is still pourable. Overmixing can toughen the texture, so fold with care.
- Divide the batter evenly among the prepared ramekins. Fill each about three-quarters full. Smooth the tops with the back of a spoon or a small spatula for even baking.
- Place the ramekins on a baking tray and bake for exactly 12-14 minutes. The edges should be set, but the centers still look slightly jiggly when gently shaken. This is the key to molten magic.
- While baking, prepare a cooling rack. When done, remove the ramekins and let them rest for 1 minute. Then, carefully unmold each onto a plate by running a small knife around the edges and inverting.
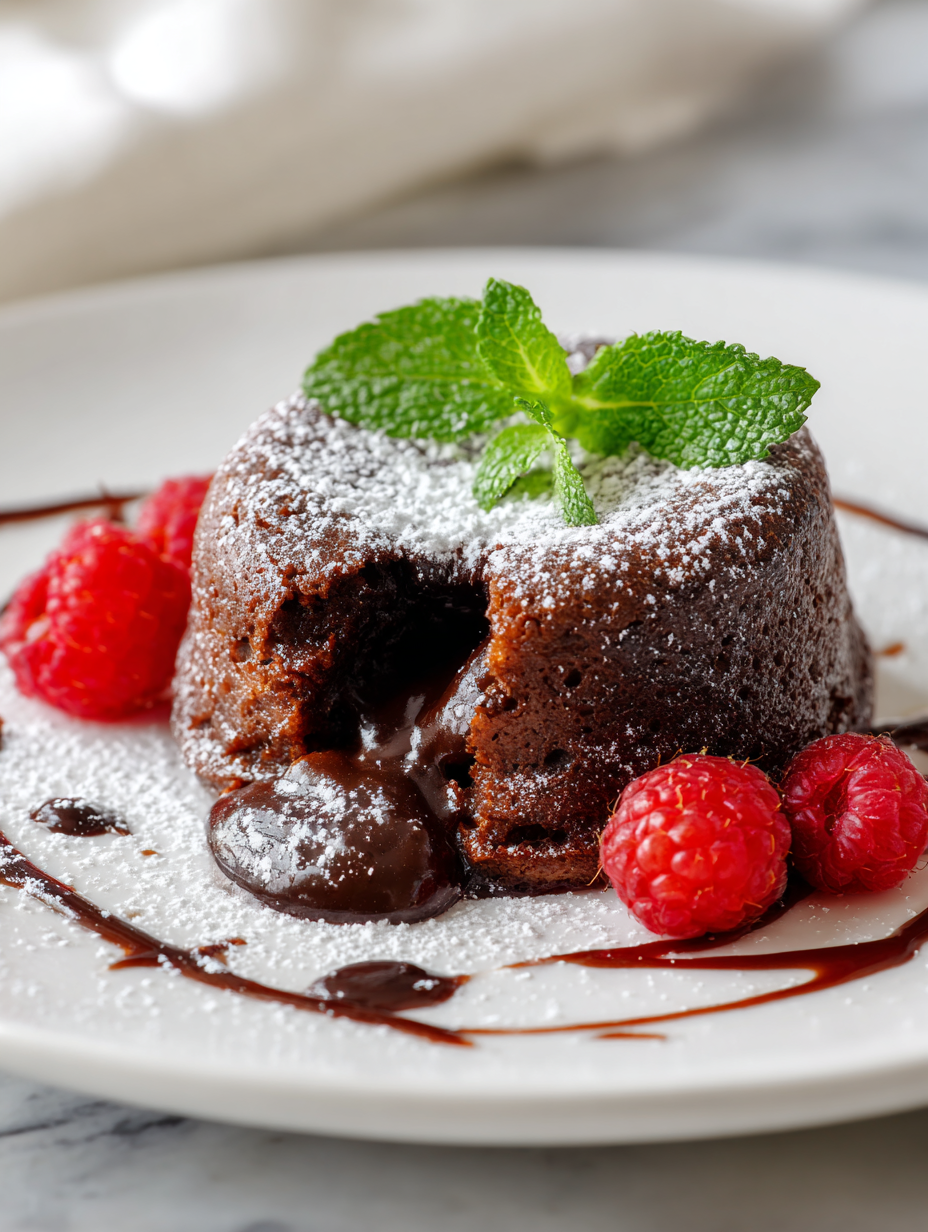
- Serve immediately—warm, with a dusting of powdered sugar or a scoop of vanilla ice cream. The crack of the crust and the molten center spilling out is the moment of pure joy.
Let the baked fondants rest for 1 minute before carefully turning out onto plates. Serve hot immediately, with optional dusting of powdered sugar or a scoop of ice cream for contrast.
How to Know It’s Done
- Edges are firm but center jiggles slightly when shaken.
- Surface is shiny and crackly with a slight crust.
- When tapped, the top emits a faint crackle, indicating proper baking.
Chocolate Fondant
Ingredients
Equipment
Method
- Preheat your oven to 200°C (390°F). Generously brush four ramekins with butter, then dust them with cocoa powder, tapping out the excess. This ensures easy release and adds a chocolatey crunch.
- Gently melt the dark chocolate and butter together using a double boiler or microwave in short bursts, stirring until smooth and shiny. The aroma of rich chocolate will start to fill your kitchen.
- In a separate bowl, whisk the eggs and superfine sugar until the mixture is pale, slightly thickened, and has a gentle froth—about 2 minutes. You'll notice the volume increase and a sweet aroma developing.
- Pour the melted chocolate mixture into the eggs and sugar, folding gently with a spatula to combine. Add vanilla extract if using, and mix just until smooth—be careful not to deflate the mixture.
- Sift the flour into the batter and fold gently to incorporate, maintaining a thick, glossy consistency. Overmixing can toughen the texture, so fold with care.
- Divide the batter evenly among the prepared ramekins, filling each about three-quarters full. Smooth the tops with the back of a spoon for an even surface.
- Place the ramekins on a baking tray and bake in the preheated oven for exactly 12-14 minutes. The edges should be set and firm, while the centers remain slightly jiggly when gently shaken.
- Remove the ramekins from the oven and let them rest for about 1 minute. Carefully run a small knife around the edges to loosen, then invert onto serving plates with a gentle, confident flip.
- Serve immediately while warm, with a dusting of cocoa powder or a scoop of vanilla ice cream. The crackly top and molten center will delight with each cut.
Pro tips for perfect fondant
- Use high-quality chocolate for a glossy, melt-in-your-mouth center that oozes just right.
- Chill your batter slightly before baking to help the centers stay molten and prevent overcooking.
- Tap the ramekins gently before baking to release any trapped air and ensure even rising.
- Bake until edges are just set and a slight crack appears on top—center should still wobble slightly.
- Let the fondants rest for a minute after baking—this helps the molten center settle perfectly when turned out.
- Serve immediately to enjoy the contrast of warm, gooey interior and firm shell—timing is everything.
- Use a small, sharp knife to loosen edges when unmolding—smooth, quick motion keeps the center intact.
Common mistakes and how to fix them
- FORGOT to grease ramekins adequately → Use generous butter and cocoa powder for easy release.
- DUMPED batter too quickly → Pour gently to avoid incorporating excess air and causing cracks.
- OVER-TORCHED the fondant → Remove when edges are set and center jiggles slightly for molten core.
- UNDERTEMPERATURE during baking → Bake for exact time and check for jiggle; underbaking leads to runny center.
Quick fixes and pantry swaps
- When batter is too thick → Splash in a little warm milk for smoother pouring.
- If fondants crack during baking → Cover with foil and bake at 180°C (355°F) for 2 minutes.
- Dumped batter too cold → Warm slightly before baking to prevent undercooked centers.
- Overbaked, center firm → Reduce baking time by 1 minute for gooey consistency.
- When fondant is too runny → Chill briefly, then bake again for 1-2 minutes to firm up the center.
Prep, store, and reheat tips
- You can prepare the batter up to a day in advance; keep it covered in the fridge and bring to room temperature before baking for best molten results.
- Unbaked fondants can be stored in the fridge for up to 24 hours; they will firm up slightly but still bake into gooey centers, just needing a few extra seconds.
- Baked fondants are best enjoyed fresh, but can be stored in an airtight container in the fridge for up to 2 days—reheat gently and watch for melting too much.
- To reheat, microwave on low power for 10-15 seconds until just warmed through. The exterior should be soft, and the center still oozy when served.
- Sensory note: reheated fondants will have a faint aroma of rich chocolate and a slightly softer crust, so don’t overdo it in the microwave to avoid losing that gooey core.
Top questions about chocolate fondant
1. What exactly is a molten center in chocolate fondant?
A molten center is when the cake is just baked enough on the edges but still soft inside, offering a gooey, flowing chocolate core. It’s the hallmark of a perfect fondant.
2. How do I know when my fondant is baked enough?
To tell if it’s done, gently shake the ramekin—edges should be set, but the middle still jiggles slightly. It shouldn’t be liquid but just barely soft.
3. Why does my fondant have a crack on top?
If the top cracks or looks overly dry, it’s probably overbaked. Remove sooner next time for that oozy interior.
4. Can I use milk chocolate instead of dark?
Use high-quality, dark chocolate for that rich, glossy molten center. Cheaper chocolates tend to seize or not melt smoothly.
5. How can I make the flavor more intense?
For a more intense flavor, add a pinch of sea salt or a splash of espresso to the batter. It enhances the chocolate’s depth.
6. How long should I wait before serving?
Serve immediately after baking, while still warm. The center will be runny and perfect for that instant gratification moment.
7. Can I reheat leftovers?
To reheat, microwave on low for 10-15 seconds, just until warm. The center should still be slightly oozy, not hard.
8. My batter is too stiff—what do I do?
If the batter is too thick, add a splash of warm milk or cream to loosen it before baking.
9. How do I unmold without breaking it?
Use a small, sharp knife to loosen the edges gently when unmolding. A quick, confident turn keeps the center intact.
10. Why is my fondant tough instead of gooey?
Don’t overmix the batter once you add flour. Gentle folding keeps the texture tender and prevents the center from becoming firm.
Baking a chocolate fondant is like capturing a fleeting moment of joy—rich, warm, and imperfectly perfect. It’s a dessert that reminds me to savor every molten, glossy bite as it spills out, just like life’s small surprises.
Whenever I make these, I think about how the chaos of the oven mirrors our own messy, beautiful moments. It’s a simple act, but one that always feels like a quiet celebration of richness and fleeting magic.

Hi, I’m Emily Carter, the founder of Absolute Chaos Mode. Born and raised in Portland, Oregon, I grew up in a household where dinner was equal parts delicious and unpredictable