Garlic Parmesan Green Beans are my go-to side when I want something crispy, cheesy, and bursting with flavor. There’s a certain magic in how the garlic turns golden and fragrant, forming a salty crust that makes each bite addictive. It’s honestly the kind of dish I keep going back to, no matter what else is on the table.
What I love most is how simple ingredients transform into something special — tender beans with a crispy edge, all coated in cheesy, garlicky goodness. It’s a quick fix for weeknights, but also feels fancy enough for a weekend dinner. Plus, that smell when the garlic hits the hot pan? Pure comfort.
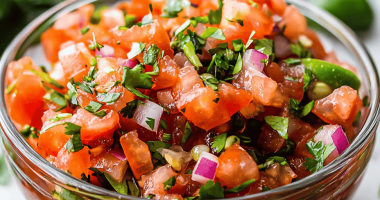
Focusing on how the garlic and Parmesan develop a crispy, golden crust that transforms simple green beans into a crave-worthy side, emphasizing the contrast between tender beans and the savory, cheesy crunch.
The story behind this recipe
- This recipe came from a lazy Sunday afternoon, when I had a bag of fresh green beans and a craving for something savory and crispy. I started experimenting with garlic and cheese, hoping to mimic those irresistible crispy edges at a restaurant. Turns out, the magic is in the quick sear and that moment when the Parmesan turns golden and crunchy.
- One of my favorite memories is standing over the stove, the smell of garlic bubbling and Parmesan sizzling, feeling like I discovered a secret shortcut to flavor. It’s a simple dish that’s become a staple for busy nights, but I still get a little thrill watching the cheese melt and crisp up so perfectly.
- heading: ‘The story behind this recipe’
Ingredient breakdown: key components
- Green beans: I like to choose firm, bright green beans that snap easily; they stay crisp and vibrant after cooking. If yours look dull or limp, try a quick ice bath post-blanch to boost their color and crunch.
- Garlic: Fresh garlic cloves give the best aroma and flavor—peel and mince just before cooking to keep the sharpness lively. If you want milder garlic, roast it first for a sweeter, softer note.
- Parmesan: I prefer freshly grated Parmesan for that nutty, salty punch and better melt. The cheese should turn golden and crispy quickly—if it’s not browning, crank up the heat slightly or let the pan get hotter first.
- Olive oil: Use a good-quality, extra-virgin olive oil—it adds richness and helps the cheese crisp up. If you’re out, a neutral oil like canola can work, but you’ll miss some flavor depth.
- Lemon zest (optional): A quick sprinkle brightens everything with a zing that cuts through the richness. If you don’t have lemon, a splash of vinegar can add a similar tang, just use sparingly.
- Salt & pepper: I keep it simple here, but a pinch of flaky sea salt and freshly cracked black pepper really elevate the flavors. Adjust to taste after cooking—over-salting can overwhelm the cheese’s savoriness.
- Red pepper flakes (optional): A pinch adds a subtle heat that contrasts nicely with the cheese and garlic. Use sparingly if you prefer just a gentle warmth.
Spotlight on key ingredients
Green beans:
- I pick firm, bright green beans that snap easily; they stay crisp and vibrant after cooking. Dull or limp beans benefit from a quick ice bath to boost their color and crunch.
- Garlic: Fresh, plump garlic cloves give the best aroma and sharpness—peel and mince right before cooking to keep that pungent punch. Roasting garlic beforehand can mellow its bite into a sweet, soft note.
Parmesan:
- I use freshly grated Parmesan for that nutty, salty flavor and better melting; it crisps up quickly and evenly when heated. Keep an eye on the cheese to prevent burning—once deep golden, it’s perfect.
- Olive oil: A good-quality extra-virgin olive oil adds richness and helps the cheese crisp; a neutral oil can be a backup but won’t add the same depth of flavor.
Notes for ingredient swaps
- Dairy-Free: Swap Parmesan for nutritional yeast or a dairy-free cheese alternative. Expect a slightly different umami punch, but still cheesy and savory.
- Vegan: Use vegan Parmesan or a toasted almond or cashew crumble. It adds nuttiness and crunch, though it won’t melt like cheese.
- Low-Sodium: Choose unsalted Parmesan or reduce salt overall. The dish will be less salty but still flavorful with garlic and cheese aroma.
- Olive Oil: Substitute with avocado or light sesame oil. They bring different flavor profiles but keep the beans crisp and shiny.
- Lemon Zest: Omit or replace with a splash of vinegar or a squeeze of lime for brightness. The tang enhances the overall freshness.
- Garlic: Use garlic powder or roasted garlic for milder, sweeter notes. Adjust the timing since powders cook faster and won’t sizzle.
- Beans: Try snap peas or asparagus for a different veggie crunch. They’ll cook faster but still develop a lovely sear and flavor.
Equipment & Tools
- Large skillet (cast iron preferred): Provides even heat and good sear for the beans and cheese.
- Wooden spoon or spatula: For tossing and stirring ingredients without scratching the pan.
- Microplane or garlic press: Quickly minces garlic to maximize flavor release.
- Plate lined with paper towels: To drain excess oil if needed and keep the beans crisp.
Step-by-step guide to garlic Parmesan green beans
- Equipment & Tools: Use a large skillet (preferably cast iron) to get a good sear; a wooden spoon or spatula for tossing; a microplane or garlic press for quick garlic prep; and a plate lined with paper towels for draining if needed.
- Prep the green beans: Rinse and trim the ends, leaving them intact. Pat dry thoroughly. A dry surface helps them sear better.
- Mince garlic: Peel and finely chop or press the garlic just before cooking to keep that sharp, pungent aroma alive.
- Heat the skillet: Place over medium-high heat (~200°C / 400°F). Add 2 tbsp olive oil, swirl to coat. Wait until shimmering but not smoking.
- Sear the beans: Add green beans in a single layer. Cook for 3-4 minutes, stirring occasionally, until they start to blister and turn vibrant green.
- a. For even searing, don’t overcrowd the pan; cook in batches if needed.
- b. If beans release too much water, turn up the heat slightly to help evaporate moisture and promote crispness.
- c. When they’re nicely browned and tender-crisp, transfer to a plate to keep warm.
- Cook garlic: In the same pan, lower heat to medium (~160°C / 320°F). Add garlic. Stir quickly for about 30 seconds, until fragrant and just beginning to golden.
- Add cheese: Sprinkle grated Parmesan evenly over the hot pan. Let it melt and crisp for 1-2 minutes, stirring gently to coat beans and develop a golden crust.
- a. Watch for cheese turning a deep golden—if it browns too fast, lower heat.
- b. If cheese sticks or burns, remove from heat immediately.
- Combine & season: Return green beans to the pan. Toss to coat with garlic and Parmesan crust. Season with salt, pepper, and optional red pepper flakes.
- Final check: The cheese should be crispy and aromatic; beans should be tender yet crisp. Adjust seasoning as needed.
- Rest & Plate: Transfer to a serving dish. Sprinkle with lemon zest if desired. Serve immediately to enjoy the crispy cheese and bright flavors.
- Checkpoints & How to Know It’s Done: Green beans are tender but still crisp; Parmesan is golden and crispy; garlic is fragrant and not burnt.
Serve immediately while the cheese is crisp and fragrant. For extra brightness, sprinkle with lemon zest or a squeeze of lemon juice. Plate in a wide dish to showcase the crispy cheese crust and vibrant green beans.
How to Know It’s Done
- Crispy, golden Parmesan cheese with a slight crackle.
- Bright green beans that snap when bitten.
- Aromas of garlic and toasted cheese fill the air.
Pro tips for perfect garlic Parmesan green beans
- High heat: Preheat your pan until shimmering to get that perfect sear on the beans and cheese.
- Dry beans: Pat green beans thoroughly before cooking to ensure they blister and crisp properly.
- Cheese timing: Add Parmesan just as the pan cools slightly to avoid burning and to develop that golden crust.
- Garlic quick sear: Toss minced garlic in the pan for only 30 seconds—longer and it can burn, turning bitter.
- Layer flavors: Add a pinch of red pepper flakes early for a subtle heat that enhances the cheesy crunch.
- Crisp cheese: Let the Parmesan sit undisturbed for a minute after adding, so it crisps up nicely before tossing.
- Finish hot: Serve immediately to enjoy the contrast of tender beans and crispy, cheesy bits—resting cools down the crispness.
Common mistakes and how to fix them
- FORGOT to preheat the pan → Always heat well before adding beans.
- DUMPED all cheese at once → Add cheese gradually for even crisping and melting.
- OVER-TORCHED cheese → Reduce heat when cheese turns golden; it burns quickly.
- MISSED the garlic step → Mince garlic just before adding for maximum aroma.
Quick fixes and pantry swaps
- When cheese isn’t crisping, splash a little more oil and turn up heat for 5 seconds.
- If beans are soggy, patch with a quick blast under high heat in a hot pan.
- Splash vinegar or lemon to brighten if garlic flavor is muted after cooking.
- When cheese burns, shield with a lid and reduce heat to recover crispy texture.
- DUMPED too much salt? Rinse beans briefly and pat dry before re-seasoning.
Prep, store, and reheat tips
- Prep the green beans: Trim and rinse thoroughly. Keep in an airtight container in the fridge for up to 24 hours. The beans stay crisp and vibrant when stored properly.
- Mince garlic ahead of time: Prepare and store in a small jar or container in the fridge. Use within 1-2 days for maximum pungency and freshness.
- Grate Parmesan in advance: Keep grated cheese in an airtight container in the fridge. It will stay fresh and ready for quick melting during cooking.
- Reheating: Gently warm leftovers in a skillet over low heat, stirring often. Expect some cheese crispness to soften, but the flavors will still be bright and garlicky.
- Flavor change over time: The cheese may lose some crispness and the beans might soften slightly after refrigeration. Best enjoyed fresh for crunch and vibrancy.
- Storage duration: Keep prepared components for no more than 1-2 days to maintain optimal texture and flavor. Reheat until fragrant and cheese begins to crackle again.
Top questions about garlic Parmesan green beans
1. Can I use frozen green beans?
Yes, you can use frozen green beans. Thaw and pat dry to ensure they sear properly and stay crispy.
2. Is this dish dairy-free?
Absolutely. Use a dairy-free cheese alternative or nutritional yeast for that cheesy flavor without dairy.
3. Can I roast the garlic first?
Yes, roasting garlic beforehand makes it milder and sweeter, perfect if raw garlic is too pungent for you.
4. What’s a good cheese substitute?
If Parmesan isn’t available, nutritional yeast gives a similar cheesy flavor, though it won’t crisp like cheese.
5. How do I know when the green beans are done?
Cook the beans until they are bright green and just tender. The crispy exterior is key for texture.
6. When should I add the Parmesan?
Add cheese only when the pan cools slightly to prevent burning. Wait for a deep golden color for best crispness.
7. What’s the best pan for this recipe?
Use a cast iron skillet if possible. It heats evenly and helps develop that perfect crispy cheese crust.
8. What if my cheese isn’t crispy?
If the cheese isn’t crisping, turn up the heat slightly and let it sit undisturbed for a minute.
9. How should I serve this dish?
Serve immediately after cooking to enjoy the cheese’s crispy texture and the vibrant crunch of the beans.
10. Can I make this ahead?
Leftovers can be refrigerated for up to 1 day. Reheat in a hot skillet to restore some crispness.
These garlic Parmesan green beans are a reminder that simple ingredients can deliver a punch of flavor and texture. The crispy cheese and tender beans offer a satisfying bite that’s perfect for any season or meal. Honestly, once you get the hang of that golden crust, you’ll keep coming back for more.
They’re just messy enough to feel homemade, but polished enough to serve at a dinner party. Sometimes, it’s the little tricks—like waiting for the cheese to turn deep golden—that make all the difference. No matter how often I make them, I still love that first crackle of crispy Parmesan as I dig in.

Hi, I’m Emily Carter, the founder of Absolute Chaos Mode. Born and raised in Portland, Oregon, I grew up in a household where dinner was equal parts delicious and unpredictable