Making paneer from scratch for this tikka masala feels like reconnecting with the fundamentals of Indian cooking. The fresh, milky aroma that wafts up as the curds form is a reminder of how simple ingredients can transform into something richer and more vibrant. It’s a process that demands patience but rewards you with a texture and flavor store-bought paneer just can’t match.
There’s something deeply satisfying about pressing and cutting your own paneer, knowing it’s made with love and fresh milk. It elevates the dish, giving it a creamy, slightly sweet undertone that complements the smoky spices and tangy tomato gravy. Honestly, once you’ve tasted homemade, you might find yourself craving it in more than just this recipe.
Focusing on how making paneer from scratch transforms the dish, adding a fresh, milky note that store-bought paneer can’t match.
The magic of homemade paneer
- Making paneer from scratch makes me feel like I’m reclaiming a piece of childhood, the smell of fresh milk always takes me back.
- There’s a quiet pride in pressing out that perfect block of paneer, knowing I made every step myself.
- This dish reminds me of family dinners, the kind where everyone gathers around the table and shares stories over spicy, creamy goodness.
- Honestly, I get excited just smelling the smoky spices as they hit the hot pan—like the start of something special.
- Sometimes I’ll add a pinch of garam masala just before serving, it’s my little secret to a deeper flavor.
The inspiration behind this dish
- This recipe came about during a rainy weekend when I was craving comfort food that also reminded me of roadside dhabas in India. The smoky aroma of grilled paneer, combined with the rich, spiced tomato gravy, takes me right back to those bustling, lively streets. It’s a dish that feels like a warm hug, even on the gloomiest days.
- I’ve always loved the way homemade paneer elevates this dish—its soft, milky texture soaking up the masala in a way store-bought just can’t. I started experimenting with different spice blends and found that a splash of roasted cumin and a pinch of smoked paprika really deepen the flavor. Now, it’s become a weekend ritual to make it from scratch, filling the kitchen with a comforting, spicy scent that makes everyone gather around.
- heading
- story_type
Trivia and Origins of the Dish
- Paneer Tikka Masala’s roots trace back to North Indian street food vendors who grilled paneer over open flames, infusing it with smoky flavor.
- The dish gained popularity in the West during the British colonial era, blending Mughlai influences with local ingredients and spice blends.
- Traditionally, the marinade includes yogurt and spices that tenderize and flavor the paneer, making each bite a burst of tangy, smoky goodness.
Key ingredients and tips
- Paneer: I love making paneer fresh; it’s soft, milky, and surprisingly forgiving. Skip the store-bought for a richer, more tender bite.
- Yogurt: I use thick, full-fat yogurt for the marinade—adds tang and helps tenderize. If you’re dairy-free, coconut yogurt works but alters the flavor subtly.
- Spices: Garam masala, turmeric, and smoked paprika—these are my flavor pillars. Feel free to adjust for more smoky or earthy notes depending on your mood.
- Tomatoes: I prefer ripe, bright tomatoes—juicy and tangy, they give the gravy its vibrant color and flavor. Canned crushed tomatoes are a handy substitute.
- Cream: I finish with a splash of heavy cream—adds richness and a velvety texture. Coconut cream can substitute for dairy-free versions, but it’s a bit thicker and sweeter.
- Oil: I use neutral oil for the marinade and cooking—canola or vegetable. Toasted mustard oil adds depth if you want a more authentic, smoky aroma.
- Ginger & Garlic: Fresh is best—fragrant, pungent, and vital for that punch of flavor. Mince finely to avoid lumps in the gravy.
Spotlight on key ingredients
Paneer:
- I love making paneer fresh; it’s soft, milky, and surprisingly forgiving. Skip the store-bought for a richer, more tender bite.
- Yogurt: I use thick, full-fat yogurt for the marinade—adds tang and helps tenderize. If you’re dairy-free, coconut yogurt works but alters the flavor subtly.
Spices & Tomatoes:
- Spices: Garam masala, turmeric, and smoked paprika—these are my flavor pillars. Feel free to adjust for more smoky or earthy notes depending on your mood.
- Tomatoes: I prefer ripe, bright tomatoes—juicy and tangy, they give the gravy its vibrant color and flavor. Canned crushed tomatoes are a handy substitute.
Notes for ingredient swaps
- Dairy-Free: Coconut or almond yogurt can replace traditional yogurt, but expect a slightly sweeter, nuttier flavor. It won’t tenderize as much but still adds good tang.
- Paneer: Firm tofu, pressed and cubed, offers a neutral, spongy texture. It absorbs spices well but lacks that milky richness of paneer.
- Cream: Coconut cream or cashew cream work beautifully for a dairy-free, velvety finish. Expect a richer, slightly sweeter sauce with coconut cream.
- Tomatoes: Roasted red peppers blended into the gravy add smoky sweetness if fresh tomatoes aren’t ripe or in season. It’s a sweet, smoky swap.
- Spices: Smoked paprika can be swapped for regular paprika if you want less smoky flavor. For extra depth, add a pinch of cumin seeds or coriander powder.
- Oil: Ghee or toasted mustard oil lend authentic aroma and smoky notes. For a neutral flavor, stick with vegetable or canola oil.
- Ginger & Garlic: Use jarred minced versions in a pinch. Fresh is better for aroma, but the jarred stuff works in a pinch without sacrificing too much flavor.
Equipment & Tools
- Non-stick or cast iron pan: For even cooking and good sear on paneer.
- Spatula: To flip and stir ingredients gently.
- Knife and cutting board: To cut paneer, onions, and tomatoes precisely.
- Small bowl: For marinating the paneer and mixing spices.
Step-by-step guide to Paneer Tikka Masala
- Prepare your tools: a non-stick or cast iron pan, a spatula, a cutting board, and a knife. Set aside a small bowl for marinating the paneer.
- Cut the paneer into 1-inch cubes. In a bowl, mix yogurt, spices, garlic, ginger, and a pinch of salt for the marinade. Toss the paneer cubes gently in the marinade, ensuring they’re well coated. Let sit for at least 30 minutes, or up to 2 hours in the fridge.
- Heat the pan over medium-high heat, around 180°C (356°F). Add a tablespoon of oil and let it shimmer. Carefully place the marinated paneer in the pan, without crowding. Cook for 3-4 minutes until golden on one side, then flip and cook another 3-4 minutes. Remove and set aside.
- In the same pan, add a little more oil if needed. Sauté diced onions over medium heat for about 5 minutes until translucent and slightly caramelized. Add chopped tomatoes, cook for another 8-10 minutes, stirring occasionally, until the oil starts to separate and the gravy thickens.
- Stir in spices like garam masala, smoked paprika, and turmeric. Cook for 1-2 minutes until fragrant. Pour in a splash of water or stock to loosen the sauce if needed. Add the cooked paneer back into the pan, stirring gently to coat in the sauce. Simmer for 5 minutes to meld flavors.
- Finish with a splash of cream or coconut milk, stirring to create a velvety texture. Adjust seasoning with salt or more spices if needed.
- Rest the dish for 2-3 minutes off heat. Garnish with fresh cilantro if desired. Serve hot with basmati rice or warm naan.
Let the curry sit for a few minutes off the heat, then garnish with chopped cilantro. Serve immediately over warm rice or with naan, letting the flavors settle and the sauce thicken slightly during resting.
How to Know It’s Done
- Paneer is golden and slightly charred around edges.
- Tomato gravy is thick, with oil separating at the edges.
- Paneer absorbs flavors, appearing juicy and tender.
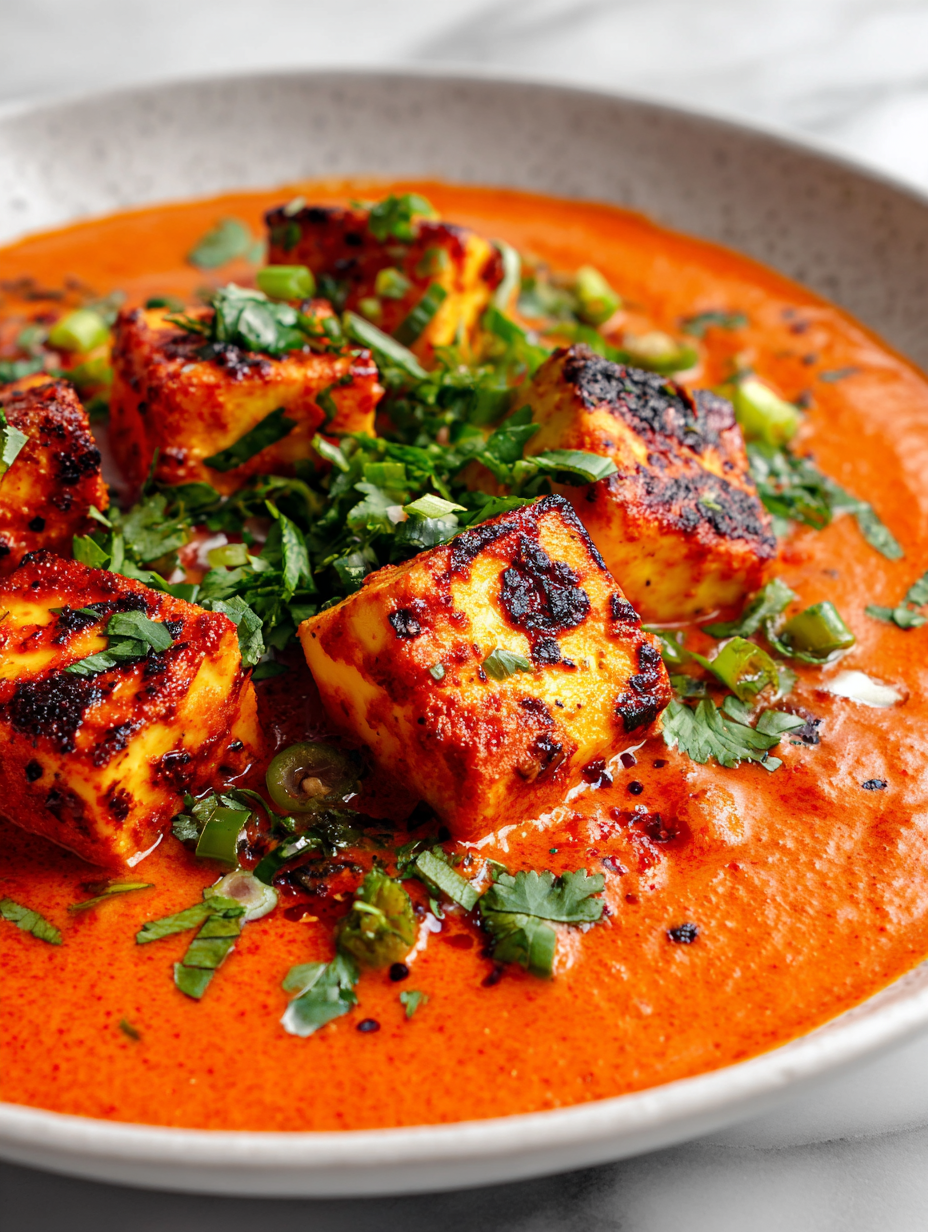
Homemade Paneer Tikka Masala
Ingredients
Equipment
Method
- Heat the milk in a heavy-bottomed pot over medium heat until just steaming, then add lemon juice or vinegar gradually, stirring gently until the milk curdles and separates into curds and whey. Turn off the heat and let it sit for a few minutes.
- Line a sieve with cheesecloth or a clean kitchen towel, and pour the curdled milk through to drain the whey. Rinse the curds with cold water to remove the lemon vinegar flavor.
- Gather the edges of the cloth and press out excess water, then shape the curds into a flat block. Place a heavy object on top and let it press for about 30 minutes to firm up the paneer.
- Cut the pressed paneer into 1-inch cubes and set aside. In a small bowl, mix the yogurt, garam masala, turmeric, smoked paprika, minced garlic, grated ginger, and a pinch of salt to prepare the marinade.
- Toss the paneer cubes gently in the marinade, ensuring they are well coated. Let them marinate for at least 30 minutes in the fridge.
- Heat a tablespoon of oil in a non-stick or cast iron pan over medium-high heat. Place the marinated paneer cubes in the hot pan and cook for 3-4 minutes on each side until golden and slightly charred. Remove and set aside.
- In the same pan, add a bit more oil if needed and sauté the chopped onion until translucent and fragrant, about 5 minutes. Add the chopped tomatoes and cook for another 8-10 minutes until the mixture thickens and oil begins to separate from the gravy.
- Stir in the spices—garam masala, turmeric, smoked paprika—and cook for 1-2 minutes until aromatic. Pour in a splash of water or stock if the mixture is too thick, then add the cooked paneer back into the pan, gently stirring to coat with the sauce. Simmer for 5 minutes.
- Finish by stirring in the heavy cream and simmer for another 2 minutes until the sauce is silky and well combined. Taste and adjust salt as needed.
- Garnish with fresh cilantro if desired, then serve the hot paneer tikka masala over basmati rice or with warm naan for a complete meal.
Notes
Pro tips for perfect Paneer Tikka Masala
- Bold marinade: Let the paneer sit in the marinade for at least 30 minutes to absorb maximum flavor and get a tender crumb.
- High heat: Cook the paneer over medium-high heat until golden and slightly charred—this adds smoky depth and texture.
- Layer flavors: Sauté spices until fragrant before adding tomatoes—this unlocks their full aromatic potential.
- Simmer gently: Keep the gravy at a gentle simmer, not a rolling boil, to develop smooth, rich flavors without breaking down the tomatoes.
- Finish with cream: Add the cream off the heat, stirring vigorously, to prevent curdling and achieve a silky texture.
- Rest before serving: Let the curry sit for a few minutes after cooking—this lets the flavors meld and settle for better taste.
- Garnish wisely: Finish with fresh cilantro and a squeeze of lemon for bright contrast and a fresh aroma.
Common Paneer Tikka Masala mistakes
- FORGOT to adjust heat → Pan too hot, burn spices, lower to medium heat.
- DUMPED ingredients too quickly → Add gradually, stir constantly for even cooking.
- OVER-TORCHED spices → Remove from heat, add a splash of water to deglaze and cool.
- MISSED stirring during simmering → Keep an eye, stir every few minutes to prevent sticking.
Quick fixes and pantry swaps
- When sauce is too thin, splash in a little more cream and simmer until thickened.
- If paneer sticks to the pan, splash with water or oil and gently loosen it.
- Splash lemon juice if gravy tastes flat or dull in brightness.
- Patch burnt spices with a spoonful of fresh tomato or onion to dilute bitterness.
- Shield delicate paneer with a paper towel if it starts to over-brown or crackle during cooking.
Prep, store, and reheat tips
- Prepare the paneer marinade up to 24 hours in advance; keep covered in the fridge for a fresh, tangy flavor.
- Cook and cool the paneer and gravy separately; store in airtight containers for up to 3 days. Reheat gently to preserve texture.
- Reheating the dish in a pan over low heat helps revive its creamy, smoky aroma and keeps the paneer tender without drying out.
- For longer storage, freeze portions for up to a month. Thaw overnight in the fridge and reheat slowly, watching for separation or over-thickening.
- The flavors deepen overnight, so expect a more integrated, slightly richer taste after a day or two. Reheat until steaming and fragrant, and check for proper warmth.
Top questions about Paneer Tikka Masala
1. Why does homemade paneer make a difference?
Freshly made paneer has a milky aroma and a soft, spongy texture that store-bought can’t match. It soaks up spices beautifully and melts in your mouth.
2. Can I use non-dairy yogurt?
Using full-fat yogurt in the marinade tenderizes the paneer and adds a tangy bite. If dairy-free, coconut yogurt works but changes the flavor slightly.
3. How do I know when spices are toasted enough?
Cooking the spices until fragrant, about 1-2 minutes, releases their essential oils and deepens the flavor of the gravy.
4. What’s the sign the sauce is done?
The gravy is ready when the oil starts to separate from the tomato mixture, and it’s thick enough to coat the back of a spoon.
5. How do I prevent paneer from sticking?
To prevent paneer from sticking or burning, cook over medium-high heat and add a splash of water if it starts to stick.
6. How should I reheat leftovers?
Reheat gently over low heat, stirring occasionally, until steaming and fragrant. The flavors will deepen and the sauce will regain its creamy texture.
7. Should I add lemon or lime?
Adding a squeeze of lemon right before serving brightens the dish and enhances the spices’ aroma.
8. What if the gravy is too runny?
If the sauce is too thin, stir in a little more cream or cook over low heat until it thickens to your liking.
9. Can I use canned tomatoes?
Using ripe, juicy tomatoes gives the gravy its vibrant color and fresh tang, but canned crushed tomatoes are a quick substitute.
10. How long should I marinate the paneer?
Ensure the paneer is well-marinated for at least 30 minutes, so it absorbs the spices and flavors thoroughly.
Making paneer from scratch really deepens the entire dish, adding a fresh milky sweetness that store-bought just can’t match. It’s a simple step that transforms the texture and flavor, making every bite feel more personal and satisfying.
This recipe is a reminder of how a few honest ingredients, treated with patience, can create something truly comforting. When that smoky, creamy sauce finally hits your palate, it’s a moment of quiet pride—one worth every minute of prep.

Hi, I’m Emily Carter, the founder of Absolute Chaos Mode. Born and raised in Portland, Oregon, I grew up in a household where dinner was equal parts delicious and unpredictable