Cracking eggs into a hot, oiled pan sends a sharp sizzle that fills the kitchen with a faint, smoky aroma. You need to work quickly to keep the whites from spreading too thin, and to get the yolks just right—still runny but not raw.
Fumbling with the shells is part of the process—sometimes you get a splash of shell in the pan, other times a yolk breaks prematurely. It’s all about steady hands and a bit of patience, especially when you’re trying to keep everything tidy.
The gentle crackle and sizzle as the eggs hit the hot pan, each one whispering its promise of creamy, runny yolks and crispy edges. The sound is a slow, rhythmic symphony that signals breakfast is happening—nothing loud, just the soft pop and hiss of eggs meeting heat, a familiar, comforting noise.
What goes into this dish
- Eggs: Fresh, local eggs have a richer flavor and better texture—yolks are bright orange, whites are firm. Use older eggs if you want whites to set faster, but fresh ones make prettier, runnier yolks.
- Salt: A pinch of good sea salt enhances the eggs’ natural flavor—don’t skip it. Use flaky sea salt if you want a subtle crunch and extra brightness on top, especially good for finishing.
- Pepper: Freshly cracked black pepper adds a sharp, pungent bite. Skip pre-ground stuff if you can; the aroma of freshly cracked pepper just hits differently, especially when it’s still warm.
- Butter: Use real butter for richness—sizzle and melt into the eggs, adding a nutty aroma. Margarine or oil works in a pinch but loses that deep, toasty smell, and the eggs won’t be as velvety.
- Milk or Cream: A splash makes the eggs fluffier and creamier—think soft, cloud-like textures. Skip if you want leaner eggs or try water for a lighter version, though they won’t be as tender.
- Herbs: Fresh chives or parsley brighten the dish—chop finely and sprinkle right before serving. Dried herbs can be used but they tend to lose their vibrancy and aroma when cooked.
- Cheese: A handful of grated cheese melts into the eggs, adding a gooey, savory layer—cheddar, feta, or Parmesan all work. Skip cheese for a lighter, purer egg experience, or add hot sauce for a spicy kick.
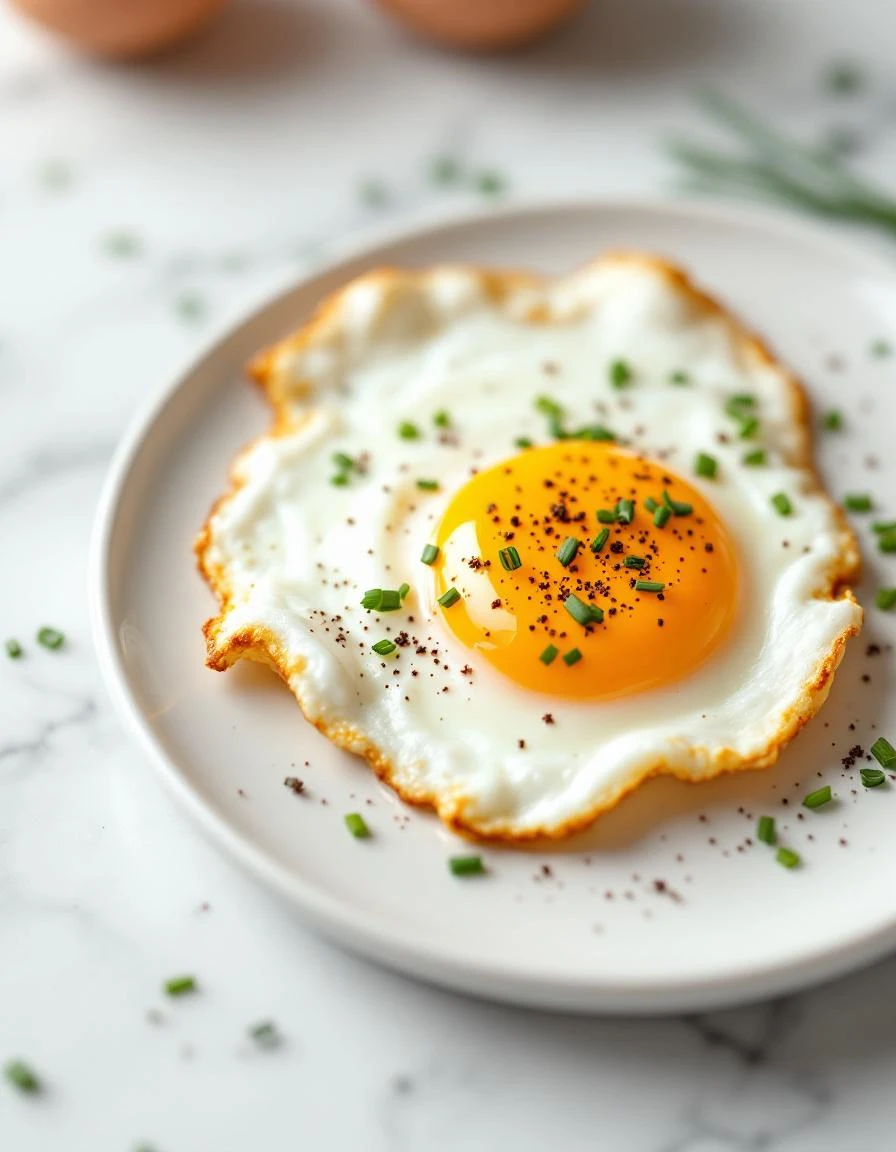
Perfect Sunny-Side Up Eggs
Ingredients
Equipment
Method
- Preheat your non-stick skillet over medium heat, and add the butter, allowing it to melt and foam slightly, releasing a nutty aroma.
- Gently crack each egg into a small bowl first to check for shells and to avoid any surprises, then carefully pour them into the hot pan, spacing them apart.
- Let the eggs cook undisturbed for about 2-3 minutes, until the whites are mostly set but the yolks remain glossy and runny, and the edges start to turn golden brown.
- Use a spatula to gently lift the edges of each egg, ensuring they are crispy and cooked through, but the yolk stays soft and runny.
- Season the eggs lightly with sea salt and freshly cracked black pepper, sprinkling them evenly for balanced flavor.
- Once the whites are fully set and the yolks still appear glossy but slightly thickened, carefully slide the spatula underneath each egg.
- Gently transfer the eggs onto a plate, keeping the yolks intact and shiny.
- Serve immediately, perhaps with toast or your favorite breakfast sides, and enjoy the perfect sunny-side up eggs with crispy edges and runny yolks.
Common Mistakes and How to Fix Them
- FORGOT to preheat the pan: Always warm it first to prevent sticking and uneven cooking.
- DUMPED too much oil: Use just enough to coat the pan; excess makes eggs greasy and heavy.
- OVER-TORCHED the eggs: Keep the heat moderate; high heat burns edges and ruins texture.
- SCRAMBLED too aggressively: Gentle folding preserves delicate curds and fluffy texture.
Make-Ahead and Storage Tips
- Hard-boiled eggs: Can be prepped a week in advance, kept in the fridge in their shells for up to 7 days. Great for quick breakfasts or snacks.
- Raw eggs: Crack and whisk ahead, store in an airtight container for up to 24 hours. Keeps prep simple and speeds up cooking.
- Flavor adjustments: Add herbs or cheese just before serving to keep them fresh and vibrant. Reheat eggs gently if needed.
- Reheating: Warm eggs slowly in a low oven or microwave, watching for overcooking or rubbery texture. Check if yolks are still runny or set.
- Flavor changes: Eggs can lose some brightness after a day or two; adding a splash of lemon juice or fresh herbs before serving helps revive them.
FAQs
1. How do I avoid shell fragments in my eggs?
Crack eggs into a bowl first to check for shells and get rid of any cracks. Gently pour into the hot pan to avoid splatters and uneven cooking.
2. What heat level works best for cooking eggs?
Use medium heat to keep the eggs from browning too quickly or sticking. The gentle sizzle should be steady, not loud or aggressive.
3. How do I get the yolks just right?
If the yolks are too runny, cover the pan briefly to help them set. For firmer yolks, cook a little longer, but keep an eye on the edges.
4. When should I season the eggs?
Add salt and pepper just before serving to keep their aroma fresh. For extra flavor, sprinkle herbs or cheese on top while still warm.
5. How do I reheat leftover eggs without ruining them?
Reheat eggs gently in a low oven or microwave, checking often. They should be warm and tender, not rubbery or dried out.

Hi, I’m Emily Carter, the founder of Absolute Chaos Mode. Born and raised in Portland, Oregon, I grew up in a household where dinner was equal parts delicious and unpredictable