Sometimes, you just need something sweet and no-fuss, especially on mornings when time feels tight and patience is thin. These no-bake peanut butter bars come together faster than you can boil water, making them perfect for those quick fix moments. Plus, they’re honest-to-goodness comfort food—rich, sticky, and just the right amount of salty peanut punch.
I love how they pull you back to childhood afternoons, where a simple spoonful of peanut butter could brighten any day. Making them requires no oven and hardly any clean-up, which means more time for sneaking bites while they set. It’s the kind of recipe you turn to when you want a little sweetness that’s honest and straightforward, no elaborate ingredients needed.
Focusing on how these bars can serve as a quick, nostalgic fix for busy mornings or unexpected sweet tooth attacks, emphasizing their simplicity and the comforting familiarity of peanut butter, especially when paired with a cup of coffee or milk.
A Quick Fix for Sweet Nostalgia
- Making these bars always takes me back to childhood afternoons, where simple peanut butter and sugar felt like magic.
- I love how quickly they come together — no oven, no fuss, just rich, sticky peanut goodness in minutes.
- There’s a small thrill in biting into something so familiar and comforting, especially when life feels chaotic.
- Sometimes, I sneak an extra pinch of salt in the mixture just for that perfect salty-sweet punch that makes me smile.
- Sharing these with friends always sparks stories of childhood treats, reminding me how food connects us all.
A Quick Fix for Sweet Nostalgia
This recipe was born out of a lazy afternoon craving and a cluttered kitchen. I wanted something that would satisfy my sweet tooth without turning on the oven or making a mess. The idea of combining peanut butter, oats, and a touch of chocolate just clicked—simple, honest ingredients that come together quickly. It’s one of those recipes I keep in my back pocket for when I need a little sweet comfort without fuss, especially on busy days or when friends drop by unexpectedly.
Historical and Cultural Tidbits
- These bars originated in 1930s America, during the Great Depression, as an easy, affordable treat using pantry staples.
- The combination of peanut butter and chocolate became popular in the 1960s, thanks to widespread marketing and the rise of candy bars.
- No-bake recipes like this gained popularity in the 20th century, especially during wartime shortages when oven use was limited.
- Peanut butter was first introduced to American households in the early 1900s and quickly became a beloved staple for quick treats.
- This simple, no-fuss dessert has become a nostalgic favorite, often appearing in school lunchboxes and family gatherings.
Ingredient Breakdown: Key Components
- Peanut butter: I use creamy, natural peanut butter—it’s oozy and rich, which helps everything stick together smoothly. Swap for almond butter if you want a nuttier twist.
- Honey: Adds a touch of sweetness and helps bind the mixture. If you’re out, maple syrup works but gives a slightly different flavor—more earthy and smoky.
- Oats: Old-fashioned rolled oats give a chewy texture. For a finer crumb, pulse them briefly in a food processor—just enough to break them down a bit.
- Chocolate chips: I prefer semi-sweet for balanced sweetness, but dark chocolate chips add a deeper, more intense cocoa flavor. Sprinkle on top or mix in.
- Butter: A bit of melted butter makes the base more cohesive and adds richness. Use coconut oil for dairy-free, but it’ll be a little more delicate.
- Salt: Just a pinch enhances the peanut butter’s savory notes and balances the sweetness. Kosher salt gives a cleaner flavor—skip if you want less salt.
- Vanilla extract: A splash deepens the flavor and rounds out the sweetness. Skip if you want a more straightforward peanut punch, but I love that subtle warmth.
Spotlight on key ingredients
Peanut butter:
- I prefer creamy, natural peanut butter—it’s oozy and rich, helping everything stick together smoothly. Swap for almond butter for a nuttier twist.
- Honey: Adds a touch of sweetness and helps bind the mixture. If you’re out, maple syrup works but gives a slightly different flavor—more earthy and smoky.
- Chocolate chips: I like semi-sweet for balanced sweetness, but dark chocolate adds a deeper cocoa punch. Sprinkle on top or mix in for a glossy finish.
Chocolate chips:
- Oats: Old-fashioned rolled oats give chew and texture. For a finer crumb, pulse them briefly—just enough to break them down a bit, but keep some integrity.
- Chocolate: Semi-sweet chips melt slightly into the surface, creating a shiny top. Using white or milk chocolate changes the flavor but still adds sweetness.
- Honey: It’s sticky and fragrant, giving the bars a chewy, gooey texture. Maple syrup can be an alternative but alters the flavor slightly.
Notes for ingredient swaps
- Nut Butters: Almond or cashew butter can replace peanut butter for a different nutty flavor, though they may be less sticky and slightly thinner.
- Sweeteners: Maple syrup or agave nectar can substitute honey, offering a different sweetness profile—less floral, more earthy or neutral.
- Oats: Quinoa flakes or crushed graham crackers can stand in for oats, changing texture and flavor; expect a slightly different chew.
- Chocolate: Carob chips or white chocolate chips can be used if you prefer milder or sweeter options—note they melt differently.
- Butter: Coconut oil or dairy-free margarine can replace butter, maintaining richness but possibly affecting firmness and flavor.
- Salt: Sea salt flakes can add a crunch and more intense saltiness, or omit entirely for a less salty bar.
- Vanilla: Almond extract or omit for a more straightforward peanut flavor—just be cautious, as these alter the aroma significantly.
Equipment & Tools
- Baking dish: Holds the mixture and shapes the bars.
- Silicone spatula: Spreads and presses the mixture evenly.
- Microwave-safe bowl: Melts the peanut butter mixture quickly and evenly.
- Parchment paper: Prevents sticking and makes removal easy.
- Sharp knife: Cuts cleanly through the set bars.
Step-by-step Guide to No-Bake Bars
- Gather your equipment: a 20x20cm (8×8 inch) square baking dish, silicone spatula, microwave-safe bowl, and parchment paper for lining.
- Line the baking dish with parchment, leaving some overhang for easy removal. Set aside.
- In a microwave-safe bowl, combine 1 cup (250g) creamy peanut butter, 1/2 cup (60g) powdered sugar, and 1/4 cup (60ml) honey.
- Microwave on medium (about 600W) for 30 seconds, then stir until smooth and oozy. If needed, microwave in 10-second bursts, stirring each time.
- Add 1 teaspoon (5ml) vanilla extract and a pinch of salt to the mixture. Stir well to combine.
- Pour the mixture into the prepared dish. Use a silicone spatula to spread and press it evenly into the corners.
- Sprinkle 1/2 cup (90g) semi-sweet chocolate chips over the top. Gently press them into the surface.
- Refrigerate for at least 2 hours, or until firm and set. You can leave it overnight for best results.
- Once set, lift the bars out using the parchment overhang. Cut into 12 squares with a sharp knife.
- Serve immediately or store for later. Keep in an airtight container in the fridge for up to a week.
Chill the bars until firm, then lift out using parchment overhang. Slice into squares and serve. For best texture, serve slightly chilled or at room temperature.
How to Know It’s Done
- The mixture should be smooth, shiny, and oozy after microwaving.
- Chocolate chips should be slightly melted into the surface, creating a glossy top.
- Bars should hold their shape when cut, with clean, even edges.
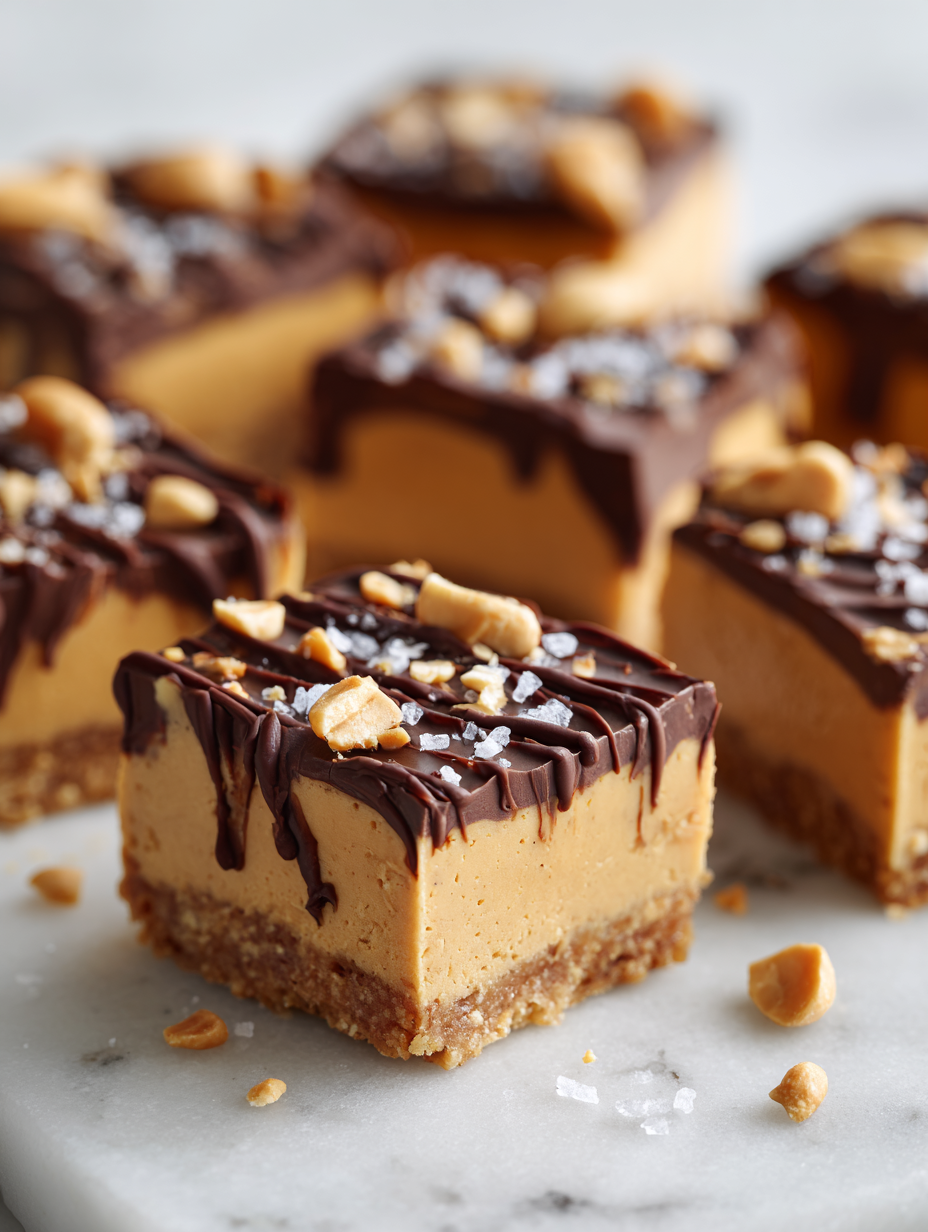
No-Bake Peanut Butter Bars
Ingredients
Equipment
Method
- Line your baking dish with parchment paper, leaving overhang for easy removal.
- In a microwave-safe bowl, combine the peanut butter, honey, and vanilla extract.
- Microwave the mixture in short 10-15 second bursts, stirring after each, until smooth and gooey—this takes about 30 seconds to 1 minute.
- Add a pinch of salt and the oats to the melted mixture, then stir until evenly combined and sticky.
- Pour the oat and peanut mixture into the prepared dish. Use a silicone spatula to press it firmly and evenly into the corners, creating a smooth surface.
- Sprinkle the chocolate chips evenly over the top and gently press them into the surface so they stick and melt slightly.
- Refrigerate the dish for at least 2 hours, or until the mixture is firm and set.
- Once firm, lift the bars out using the parchment overhang and place on a cutting board.
- Use a sharp knife to cut into 12 even squares, wiping the blade clean between cuts for neat edges.
- Serve immediately or store leftovers in an airtight container in the fridge for up to a week.
Notes
Tips for perfect bars
- Use room temperature peanut butter for easier melting and a smoother mixture.
- Microwave in short bursts and stir thoroughly to prevent uneven heating and scorching.
- Press mixture firmly into the dish to avoid air pockets and ensure even bars.
- Sprinkle chocolate chips as soon as you pour, then gently press to help them melt slightly into the surface.
- Chill the bars until fully set—at least 2 hours—to get clean slices and a firm texture.
- Use a sharp, warm knife to cut for cleaner edges and less crumbling.
- Let the bars sit at room temperature for a few minutes before slicing if they’re too firm straight from the fridge.
Common mistakes and how to fix them
- FORGOT to measure ingredients precisely? Use standard measuring cups for accuracy.
- DUMPED in all ingredients at once? Add them gradually, mixing thoroughly after each addition.
- OVER-TORCHED the chocolate? Remove from heat immediately and stir until smooth.
- MISSED the chilling step? Chill until bars are firm for clean slicing and proper texture.
Quick Fixes & Pantry Swaps
- If mixture is too thick, splash in a teaspoon of milk to loosen it quickly.
- When bars stick to the parchment, patch with a warm damp cloth for easy removal.
- Splash a bit of hot water on chocolate chips to help them melt faster and more smoothly.
- Dumped too much salt? Rinse briefly with cold water before mixing for a less salty punch.
- When mixture is crumbly, rescue with a drizzle of honey or maple syrup, then stir vigorously.
Prep, store, and reheat tips
- Prepare the peanut butter mixture and press into the dish up to 24 hours in advance. The bars develop a richer flavor as they sit.
- Store the assembled bars in an airtight container in the fridge for up to a week. The cool temp keeps them firm and fresh, with a glossy chocolate top.
- For longer storage, freeze the bars wrapped tightly in plastic wrap and then in foil for up to 3 months. Thaw in the fridge or at room temp for 30 minutes.
- Reheat slightly by letting the bars sit at room temperature for 10-15 minutes — they soften just enough to melt the chocolate slightly if needed. Avoid microwaving to prevent melting the chocolate too much.
Top questions about peanut butter bars
1. Can I use chunky peanut butter?
Use natural creamy peanut butter for the best ooze and smooth texture, but smooth commercial works fine too.
2. Can I make these vegan?
Yes, chunky adds texture, but it might make the mixture a bit harder to spread evenly.
3. What can I use instead of honey?
Substitute honey with maple syrup or agave nectar for a plant-based sweetener that still binds well.
4. How do I melt the peanut butter mixture properly?
Microwave in short bursts, about 10 seconds at a time, stirring in between to avoid overheating.
5. How long should I chill the bars?
Chill the bars until firm, at least 2 hours, to ensure clean cuts and a good texture.
6. Can I use chocolate chunks instead of chips?
Use semi-sweet chocolate chips for balanced sweetness, but dark chocolate adds a richer cocoa flavor.
7. Can I substitute the oats?
Yes, you can replace oats with crushed graham crackers or quinoa flakes for different textures and flavors.
8. How should I store these bars?
Store in an airtight container in the fridge for up to a week or freeze for longer storage.
9. My mixture is too stiff, what do I do?
If the mixture is too thick, splash in a tiny bit of milk or water and stir to loosen it up.
10. How can I get clean slices?
Use a warm, sharp knife for clean cuts and avoid crumbling the bars when slicing.
Almost nothing beats reaching into the fridge and pulling out a set of these bars after a long day. Their familiar peanut butter aroma and fudgy texture are like a quick hug in food form. Sometimes, the simplest treats remind us how comforting honest ingredients can be.
In a world full of overly complicated desserts, these bars keep it real—fast, filling, and just enough sweet. They’re perfect for last-minute cravings or a spontaneous snack that doesn’t demand much fuss. Honestly, I keep a stash hidden away for when I need that quick, satisfying bite.

Hi, I’m Emily Carter, the founder of Absolute Chaos Mode. Born and raised in Portland, Oregon, I grew up in a household where dinner was equal parts delicious and unpredictable